Home Keg Coupler Components: Must-Have Kegerator Accessories
Have you ever questioned why your draft pours either full of foam or completely flat? The secret lies in the small but mighty components connecting your keg to the tap. If you don’t have the proper hardware, even a great beer can go flat and lose its taste.
Installation Parts Supply understands that flawless pours begin with reliable components. No matter if you brew at home or simply enjoy draft beer, knowing these d system keg coupler parts makes all the difference.
Every part—from the washers to the gas lines—matters for keeping the right pressure and taste. Upwards of 90% of pouring problems are due to incompatible or damaged parts. With a bit of know-how, you can keep your setup working without a hitch.
Key Takeaways
- Proper coupler selection ensures optimal beer flow and flavor.
- Count on Installation Parts Supply for trusted draft setup parts.
- Keeping parts clean and checked avoids typical pouring glitches.
- Different beer types may require specific coupler styles.
- The majority of malfunctions start with coupler problems.
Kegerator Coupler: An Overview
The perfect draft beer starts with the right connection between your keg and tap. Think of the keg coupler as the connector between your CO₂ cylinder or nitrogen tank and the beer line, employing pressurized gas to deliver beer flawlessly to your taps. Think of it as the engine of your draft beer system—without it, nothing flows.
This small device has two jobs: it delivers gas to pressurize the keg and controls beer output. Within its housing is a probe, a check valve, plus dedicated gas and liquid ports. These components work together to maintain carbonation and prevent excess foam.
| Part | Function | Common Issues |
|---|---|---|
| Coupler Probe | Punctures the keg seal | Misalignment causes leaks |
| Check Valve | Stops beer from flowing backward | Worn valves lead to flat beer |
| Gas/Liquid Ports | Links to tubing | Foaming from loose connections |
Attaching the coupler wrong is a rookie mistake—75% of first-time users do it. The result? Foamy messes, leaks, or worse, spoiled beer. Installation Parts Supply offers compatibility charts and video guides to help you get it right.
Universal designs mean most couplers work similarly, but always match yours to your keg type. A mismatched setup won’t just ruin your pour; it could damage your equipment.
Which Keg Coupler Is Right for You?
Kegs come in many styles and each needs its matching coupler. Matching the right coupler to your beer ensures optimal carbonation and flavor. Here’s how to pick the perfect fit.
D System (Sankey) Coupler
Most North American brews—about 85%—use this style. The one-valve mechanism snaps firmly into place. Tip: Check for “Sankey” etched into the coupler.
Nitro (U) Coupler
The harp emblem identifies it for nitrogen blends like Guinness. Nitro beers rely on its special gas ratio for a silky head. A U coupler will not seat on a D-type keg—don’t attempt it.
Reverse-Thread S System Coupler
European kegs like Heineken fit this left-twist coupler. That reverse threading avoids confusion with standard Sankey. Trivia: It stands a bit taller than the North American model.
A-, G-, and M-Type Couplers
Certain European brews need these specific coupler types:
- A-Type Coupler: Fits Paulaner and Warsteiner kegs perfectly. Its sliding latch design is fail-safe.
- G-Type Coupler: Tri-flat stem locks onto Bass & Boddingtons. Found in pubs throughout Britain.
- M-Type Coupler: Made for Schneider Weisse kegs. The slide-lock clicks when secure.
Installation Parts Supply color-codes their compatibility guides—green for D, black for U, blue for S. A brewery in the Midwest reclaimed $3,000 a year after matching couplers properly. Never rely on “universal”—real compatibility wins.
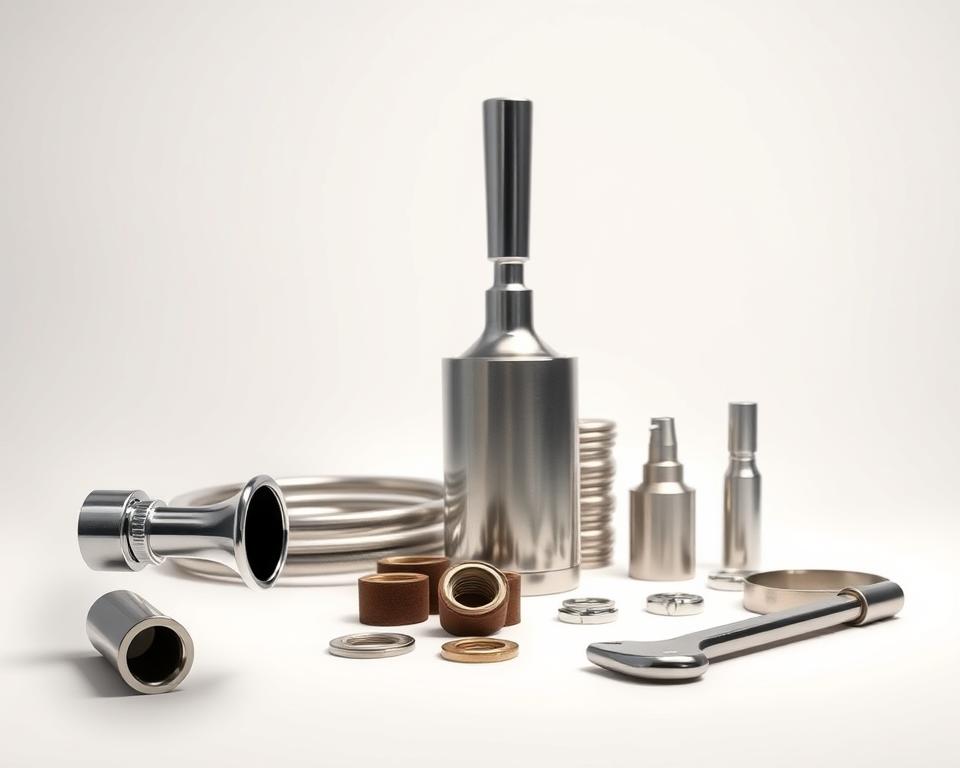
Key Coupler Components Explained
That perfect pour depends on finely tuned parts. Together, they keep carbonation in and foam out. Below are the parts you need to know.
Probe and Check Valve
The metal probe opens the keg’s seal for dispensing. Premium models last 3x longer than economy versions. Underneath, the check valve stops reverse flow—our top replacement item.
Nut and Washer Assembly
Your seal depends on that hex nut. Brass is economical; stainless fights rust. Nitrile outperforms EPDM under 40°F.
| Component | Material | Advantage |
|---|---|---|
| Probe | SS | Resists wear |
| Check Valve | FDA-approved plastic | Prevents flat beer |
| Hex Nut | Brass or Stainless | Cost-effective & durable |
Gas & Beer Ports
The gas port handles 20–30 PSI for CO₂ or nitrogen. Mismatched pressure causes foam. Liquid ports work best with 3/16″ ID tubing—1/4″ lines increase turbulence. Rebuild kits with FDA seals simplify maintenance.
Pro Tip: Replace O-rings biannually or after ~50 kegs. A $3 washer replacement beats a $150 coupler failure.
How to Set Up Your Kegerator Coupler
Getting your draft system right means perfect pours every time. Right setup stops foam and leaks. Use this step-by-step for a seamless install.
Attaching Coupler to Keg
Lift the handle and align the coupler’s lugs with the keg’s slots. Twist until firm; don’t over-torque or harm the seal. Low-profile designs reduce height by 4–5 inches for tight spaces.
Our wrench sets hex nuts to the ideal 8-10 ft-lb. A misaligned probe causes 80% of leaks. Always use fresh washers to maintain pressure.
Attaching Gas and Beer Lines
Use 5/16″ MFL fittings to attach the gas line. Seal threads to stop CO₂ from escaping. For beer lines, 10–12 feet of 3/16″ tubing balances pressure drop.
| Task | Tool | Tip |
|---|---|---|
| Gas Line | Thread sealant | Test at 30 PSI for bubbles |
| Draft Line | Tubing cutter | Cut straight for proper seals |
| Pressure Test | Soapy water | Monitor for a full day |
Advanced systems integrate mobile apps for real-time pressure monitoring. A Denver brewery cut foam by 40% using quick-connects from Installation Parts Supply. Turn off gas immediately if you spot big leaks.
Common Coupler Problems & Fixes
Nothing ruins a cold beer faster than foam spraying everywhere. Identify these key spots and you’ll solve most pour problems. Here are the usual culprits and how to remedy them.
Foam & Leak Fixes
Foam accounts for 68% of draft system complaints. Ensure your temp hovers around 38°F to control foam. Warm beer releases CO₂ prematurely.
Then, look over your draft tubing fittings. Soap test any fitting—bubbles point to leaks. Tighten any loose fittings with a wrench, but don’t over-tighten.
- Check ball failure causes intermittent flow—listen for hissing sounds
- Not sure on PSI? Use this guide:
| Style | CO₂ PSI | Nitrogen Mix |
|---|---|---|
| Pilsners | 10–12 | N/A |
| Nitro Stouts | 25–30 | 75% nitrogen |
Coupler Not Fitting Securely
If your coupler fits loosely, first check for worn O-rings. Replacing seals corrects about 40% of these problems. Bent coupler heads sometimes require new units.
Use plastic shims to level off rough keg tops. These inexpensive plastic wedges stabilize wobbling connections. Low-profile models solve clearance problems in compact coolers.
Pro Tip: Their emergency washer kit contains five critical seals. One Chicago pub trimmed loss by 18% with staff training.
Tank icing means you need to ease off the gas. Let it thaw before adjusting pressure relief valves. Digital gauges need yearly calibration for accuracy.
Coupler Cleaning & Care
Clean lines equal better-tasting beer. Leftover yeast and oils harm both taste and pouring. A simple routine keeps everything running smoothly.
Coupler Teardown
Begin with a full teardown. Separate the handle, probe, and check valve. Let the parts sit in warm PBW solution (1 oz/gallon) for 15–20 minutes. That will strip away yeast residue and hop buildup.
Our brushes get into the smallest crevices. Don’t forget the ball valve—it accumulates debris. Rinse fully so no cleaner remains.
Cleaning Products
PBW leads the pack for balanced cleaning. Acids clean quick but may degrade seals. Ultrasonic cleaners remove buildup in pro bars.
- Drying: Remove moisture with air or cloth.
- Disinfecting: Adhere to CFR 117—30-second dwell time.
- Logs: Use a log sheet to record each cleaning.
Ultraviolet systems help sterilize parts. Rinse waste per regulations—PBW can damage plumbing. A quick clean routine preserves flavor and longevity.
Conclusion
Achieve brewery-quality pours with expert hardware know-how. Matching the right hardware, regular cleaning, and proper setup make all the difference. Count on Installation Parts Supply for ongoing support and rebuild-kit deals.
Did you know? Routine care can extend your equipment’s life by 7 years. Get their checklist and attend a brewmaster session for insider advice. One yearly inspection prevents headaches—our long-term customers agree.
Ready to upgrade? Visit Installation Parts Supply today and raise your home bar game.